Monday, June 28, 2010
Calling all Wanna Be Shop Owners!
I'm sure that you have seen pictures of my two booths at Skyland Antiques. I paint antique furniture shabby chic and cottage style. My booth is going gang busters because there is no other shops, booths, etc. in Tuscaloosa that sells this look. If you paint furniture, or re purpose antiques & junk, please consider sharing a booth and selling your wares for a little extra cash! the booth next to my two is currently open and rents for $110 per month. I would love to get 3-4 of us together and split the booth and rent. It wouldn't be a big investment but a great way to get your feet wet and try it. Please contact me asap if interested. This booth won't last long!

Interview with the Decorator from Anthropologie.

Wouldn't this be your dream job? I love, love, love Anthro stores. I go in just to look at the displays they have, don't you? Here is an interview with Keith Johnson "The" shopper for Anthropologie reprinted from the Anthropologie newsletter out today.
When it comes to found objects, what catches your eye?
I always look for integrity. I don't like things that have been monkeyed around with too much - or if they have been manipulated, it has to be intentional, almost ironic. I also look for things with a great patina or things that narrate the experience of where I am.
Have you ever suffered from buyer's remorse? Oh, sure. I used to feel I needed to buy variety. It made me make choices that weren't based on falling in love with something. The thing with found objects is you have to be open to happening upon something and responding to it. If you have too strong of an agenda, you are going to force your eye into seeing things that may not be there.
You have a knack at seeing utility in art-you know how to tweak it into something more. have you always been a Doctor Frankenstein of sort?
It's definitely something that personality intrigues me, but it's a muscle I've built. I've been lucky enough to see the genius in our stores, particularly the displays. They are very inspirational - what our visual artists have done with things they have on hand is so much better than the objects themselves.
In the season premiere of MSG, we see you in Thailand, where you shop in a market consisting of 15,000-plus vendors. How did you not feel overwhelmed?
I love shopping in that particular market - there's a smell of possibility in the air, and it energizes you. You feel like you have all the energy in the world to tackle it.
You're gonna put that where??

I drug home this old battered table this weekend that I fell in love with last weekend. I thought about it all week but wasn't sure if I should spend money on my house when I was supposed to be shopping for my booth. I decided that if it was still in Birmingham next weekend and they would sell it to me for next to nothing, it was meant to be mine. After restocking and fluffing my booth Saturday, I trekked the 50 miles to the little antique store to tempt fate. Lo and Behold, there she was. Waiting for me. On sale. On clearance sale. For next to nothing. When I got it home I immediately started sanding the top in the rain. I just knew there were pine boards under all that paint. Bingo! I left the bottom all chippy and creamy white. Just like I like it. Then I asked Dave to help me move out the beautiful oak lowboy in the living room and move this in. He just gave me one of those looks and sighed. I'm loving my little shabby table.

My junk accumulation becomes a "thing"

If you are an avid junker like myself, you know you get accumulations of little piles of stuff you bought but don't know what to do with it ....quite yet. But you have faith that someday you can put all these little "treasures" together and get something that resembles the pretty pictures on your favorite blog. I have been buying white ironstone and ironstone look-a-likes for about a year now. About nine months ago I added tarnished silver to that list and recently fluted glass pitchers, and bowls. Now I discovered a gray enamelware. At least I think that's what you call it. How can someone love antiques and know very little about what she is buying? I just buy what I think is pretty....or usually what could be pretty. So here is my accumulation of under $5.00 thrift buys. It all came together when I spotted this 48 inch long shelf for $15.00 at the thrift store. It was brown wood and looked very old time country. I bought it and painted it white and distressed it. I found the one empty wall that was large enough for it and the sweet hubby hung it last night. (Twice, because I changed my mind about the height) Then I started dragging out the boxes of pretties that had been waiting patiently over the months and year and ta-DA! I have a thing. It makes me happy to walk by the thing and see all the discards I so adore. I tried to count how much money I have in everything and I'd estimate $110.00 plus a few cans of spray paint.


Friday, June 25, 2010
New Arrivals at Store - Sat. June 26th
Please click on "Shop" and view the latest arrivals making there way to the store Saturday. I may have them there Friday late afternoon if the weather holds out.
Thursday, June 24, 2010
My Store Opening at Skyland Antiques!

Well, okay it's not really a store, but it's not your ordinary booth either. So we'll call it a store within a store. Anyway, it's finally open! It opened Tuesday and today I went by to take pictures and I couldn't believe how much had sold already. I am located on the lower level on the right hand side. If you are local and will be stopping in, please sign up to follow my blog. Then send me an email or comment after any post letting me know you did and I will email you a 10% off coupon. As a follower, you will also get first peeks at what's going into the store for the week. Under "SHOP" I will post the new furniture and repurposed goods before I take them in. Skyland is open Mon.-Sat 9-5:30. Hope to see you there!


Tuesday, June 22, 2010
What to do with all those old bottles? Colored Vases!

I went through a phase a few months ago where I couldn't pass up a good flea market buy on old glass bottles. (And a few not so good buys!) Do you go through phases like that? For some reason, some crazy thing will tickle your fancy for awhile for no particular reason. Then when your fancy isn't tickled by it anymore, you're left looking at all the former objects of your affection wondering, "What the heck was I thinking?" I saw this article in a craft magazine and thought it was a great idea to make my old bottles prettier. Warning...it is a messy job! But the bottles are so feminine looking now. So now I have a whole bunch of pretty pastel bottles (that I still don't have the foggiest idea what to do with!) A girl only needs so many vases, afterall.

What You'll Need:
Glass jars and bottles
Paint - it called for oil based but I used latex
Mineral Spirits for oil based, water for latex
Take a selection of bottles and wash them in warm, soapy water,
Water down your paint a bit - or add a little mineral spitis if oil based paint.
Pour a small amount in your empty jar and swirl around carefully until the paint covers the entire inside surface. Pour away any excess paint.
Let the paint dry completely.
Wash up!
Friday, June 18, 2010
Awesome Furniture Decals!


 No, those aren't real headboards! Or lights. They're decals.
As a stager, these are the coolest things I've seen in a long time. Instead of lugging a headboard to a home to stage, why not just put up one of the many bed decals that www.whaisblik.com sells. These would be great in a college dorm or apartment as they are removeable. There are hundreds of really fun ones available on their site. Have some fun today checking out they're site.
Thursday, June 17, 2010
Alternative to Painting Ugly Furniture


I've got some a big book full of old sheet music and an ugly chair. I'm trying it!
What You'll Need:
Old Comics, fabric, sheet music, etc
PVA Glue
Clear Matte acrylic varnish
Brushes
Scissors
Step 1:
Cut out small strips from your comics and stick them in place on the chair using a PVA glue, which has been diluted with water to turn it into a thin liquid. Cover the chair completely, making sure the pieces are smooth, and flat with no loose edges or gaps, then leave to dry.
Step 2:
Apply several coats of clear matt acrylic varnish over the comic strips. Make sure you leave each coat to dry thoroughly before applying the next, to ensure a hard-wearing, protective coating.
Monday, June 14, 2010
Make an awesome Birdbath for Cheap!

You don't have to pay a lot for a one of a kind birdbath! A few issues back, Bird and Blooms magazine had an article by Dottie Baltz about how to make a "Leaf Birdbath." First find a plant with a large leaf and and gather a few other materials. I'll give you the exact instructions, but basically you are going to buy a bag of play sand and pour it on the table, cover it with a plastic bag and put the leaf over the sand and bag. Next, mix up a little concrete mixture and plop it on the leaf and spread it out to cover it. Then build it up to about 1 inch thickness. Throw a plastic garbage bag over it and let it dry for about 24 hours. Then the fun part! Slowly pull off the leaf and see the imprint in the birdbath! These are the neatest birdbaths I've ever seen. They would make great gifts and each one is unique.
My Crafty friends Dennis and Carol made one this weekend. I got to watch them pull the leaf off. Here it is before they pulled all of the leaf off.
 Here it is after the leaf is off and before they painted it.
Here are the specific directions reprinted from Bird and Bloom.Essential Materials
Large leaf
1/2 to 1 bag of play sand
3 to 4 cups of contractor's sand
1 to 2 cups Portland cement
Concrete fortifier
Instructions
1.Choose a leaf at least 10 inches long and 7 inches wide. (We used a hosta leaf here, but rhubarb, burdock, gunnera, castor bean, caladium and elephant-ear leaves also work well.) Cut the stem off.
2.Spread out a sheet of plastic or a large plastic bag to protect your work surface. Pour the play sand onto the plastic and make a pile. Wet the sand slightly so that it sticks together, the way you would for a sand castle.
3.Shape the pile to approximate the size and shape of your leaf, but keep in mind that birds do not like baths that are more than a couple of inches deep. Once the sand pile is to your liking, cover it with a piece of plastic or a plastic bag. Place the leaf vein-side up on top of the plastic, centering it.
4.In a plastic bowl, mix three parts contractor's sand to one part Portland cement. Mix 1/4 cup of water and 1/4 cup of concrete fortifier, and add slowly to the sand until it reaches the consistency of a thick brownie batter. The easiest way to do this is to squish it with your hands wearing rubber gloves. Mix more water and fortifier to add to the sand if needed. Rinse your gloves or hands. Pick up a handful of the sand mixture, plop it on the center of the leaf and spread to the edges. This gives you a solid surface that picks up the leaf's veining while removing air bubbles.
5.Now slowly start building up the thickness of the casting. For strength, keep it between 1/2 and 1 inch thick. Be careful to keep the edges smooth to get a good contour. Once you have it at a good thickness, build up the center to make a pedestal.
6.Cover the mixture loosely with plastic. If it's a hot day, you might want to mist the casting from time to time to keep it from drying out too fast and cracking. Let your project dry slowly for about 24 hours, then peel off the leaf. If the casting feels brittle, let it sit for another day.
7.After the casting has dried for a good week, you can paint or seal it. (We painted this one green.) Or just leave it as is!

Monday, June 7, 2010
Make-over for a built in
I have mixed feelings about "built-ins". Unless they are high end cabinetry, I think they give a spec. home feel to a house. Spec homes can be very beautiful. They just aren't for me. I like to pretend that I live in a little, quaint cottage. I don't. It was custom built for someone else. It was a well loved home and needed nothing when we moved in a year and a half ago. Except it needed to become a reflection of me and my family. This is the second home that we have moved into that used to belong to a prominent family in town. It takes a long time before people quit asking you if you live in "the Baxter's house" (I made that name up...you get the idea) After a while, you want to scream, "No, I live in the Richardson house!" It's all the little things you do or change that make it feel like you have put your signature on your home. With the built-ins, we added beadboard behind the shelves and covered up all the peg holes on the sides where you can adjust the shelf. We used spackling. We took out a bunch of shelves to give it a different feel. I'm tolerating the built-in better now. After a year and a half, it feels like home now and no one has asked me if I live in "the Coach's house" lately. However, yesterday someone did ask me if I lived in that house with all the junk stacked up in the garage! (I'm sorry in advance to the family that lives here after us.)
Before we moved in (Picture from MLS): After:
 Beadboard painted antique white
Before we moved in (Picture from MLS):
 After:
 Beadboard painted antique white
29 nail holes & 11 pictures later....
I've finally found that perfect "thing" to hang above my bed. I wanted something soft and romantic to go with the room atmosphere. Everything I tried stuck out or called too much attention to the object. I found these wonderful scratch off vinyl decals at "Studiojk" on Etsy (Lordy, I need to learn how to make a link...sorry) Anyhoo, my husband tells me they were easy to hang. He wouldn't let me do it since I don't use a level (hence, the 29 previous nail holes) and this one you only had one chance to get it right. Those weren't good odds for me. I also got three little birds that I have perched on an old sign in my entry. Sometimes it's the little touches that add so much!


My new assistant's first day staging
Due to the absence of my collaborator and partner in crime, Carolyn; I have found it necessary to replace her as she lallygags at the beach, and plans on being gone off and on all month. I'll miss her but I'm certain Miss Isabelle will temporarily fill in nicely for her. If I could only teach her to make ruffles for me.
Message in a Bottle
Dear Carolyn,
Please come home soon. My bobbin is out of thread.
Signed,
Threadless in Tuscaloosa
Please come home soon. My bobbin is out of thread.
Signed,
Threadless in Tuscaloosa
Friday, June 4, 2010
Ugly Chair Transformation
There comes a time when a girl has to look herself in the mirror and be honest with about the person she sees looking back at her. Today I did that. I've admitted to myself and now the whole world (or at least my 57 faithful follower's!) that I, Sue, am a ruffle addict. Yes, I am addicted to anything with a pretty little (preferably white)ruffle. I swear if my husband brought me a cockroach resting on a pretty ruffle, I'd probably think it was charming. Maybe not. But I think the show Intervention may be featuring me next week if that new OCD reality show doesn't nab me first. I am an obsessive compulsive ruffle collector. So, when my youngest son moved back home from college this summer dragging along this ugly armless chair that his cat had clawed to pieces, I debated whether or not to throw it on the side of the road or call my Seamstress Goddess, Carolyn. I guess you see I called her and she made me this adorable slipcover with....not one, but two beautiful ruffles! (I tried to get more ruffles out of her on the seat and around the edges, but she just gave me the evil eye.)This is Carolyn's first attempt at a large slipcover and I'd give her an A+! You can check out her blog at www.enhancedsewing.blogspot.com She doesn't have her slipcover's on her site yet as she is transitioning into a new sewing market. Look for many of our collaborations in the near future.She's loaned me her old sewing machine and given me a sewing lesson. I requested my first lesson be on ruffle making. I just got those evil eyes again! Please visit two great links this weeks for more fab decorating ideas: www.betweennapsontheporch.blogspot.com and www.southernhospitalityblog.com
Before: This picture was taken before my college son ever took the chair. Picture it stained, cat clawed, and ripped. After: pretty in white.


Before: This picture was taken before my college son ever took the chair. Picture it stained, cat clawed, and ripped.
 After: pretty in white.


Subscribe to:
Posts (Atom)
 |
| Make your own picture slideshow |

.jpg)
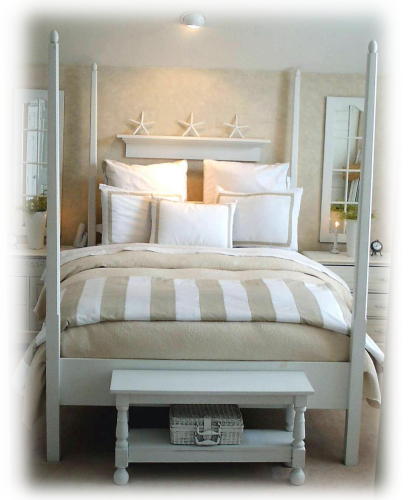
Beachy Bedroom
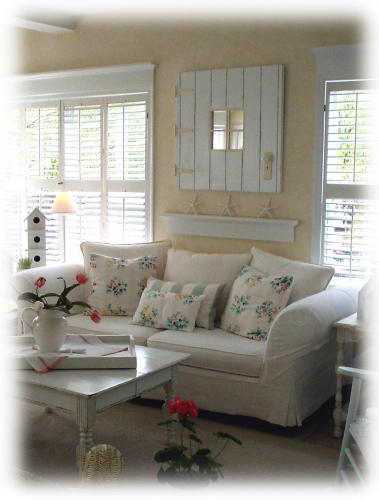
Shabby Chic Living Room
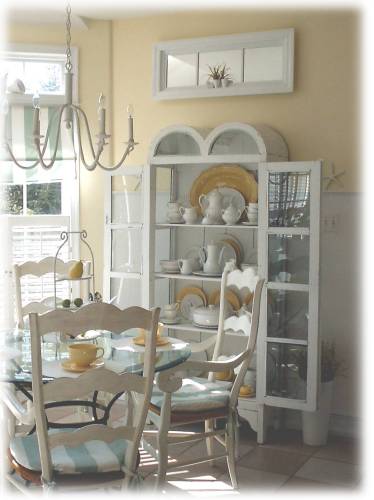
Shabby Chic Dining Room